UI Overview
Tour of the main interface and panels.
The app window is built around a command bar, a jobs table (with search and filters), and a details panel. Layout is configurable: the command bar is top by default (or bottom in Settings → Interface), and the table/details panels can be default (table left, details right) or swapped. Use this overview to find where to add files, run the pipeline, and manage exports.
Step 1 — Main layout
When you open the app you see: the command bar (top or bottom, depending on settings), and below it the main content: the Jobs table in a card and the Details panel on one side. A resizable splitter sits between the table and the details panel; the details panel width is saved in interface settings.
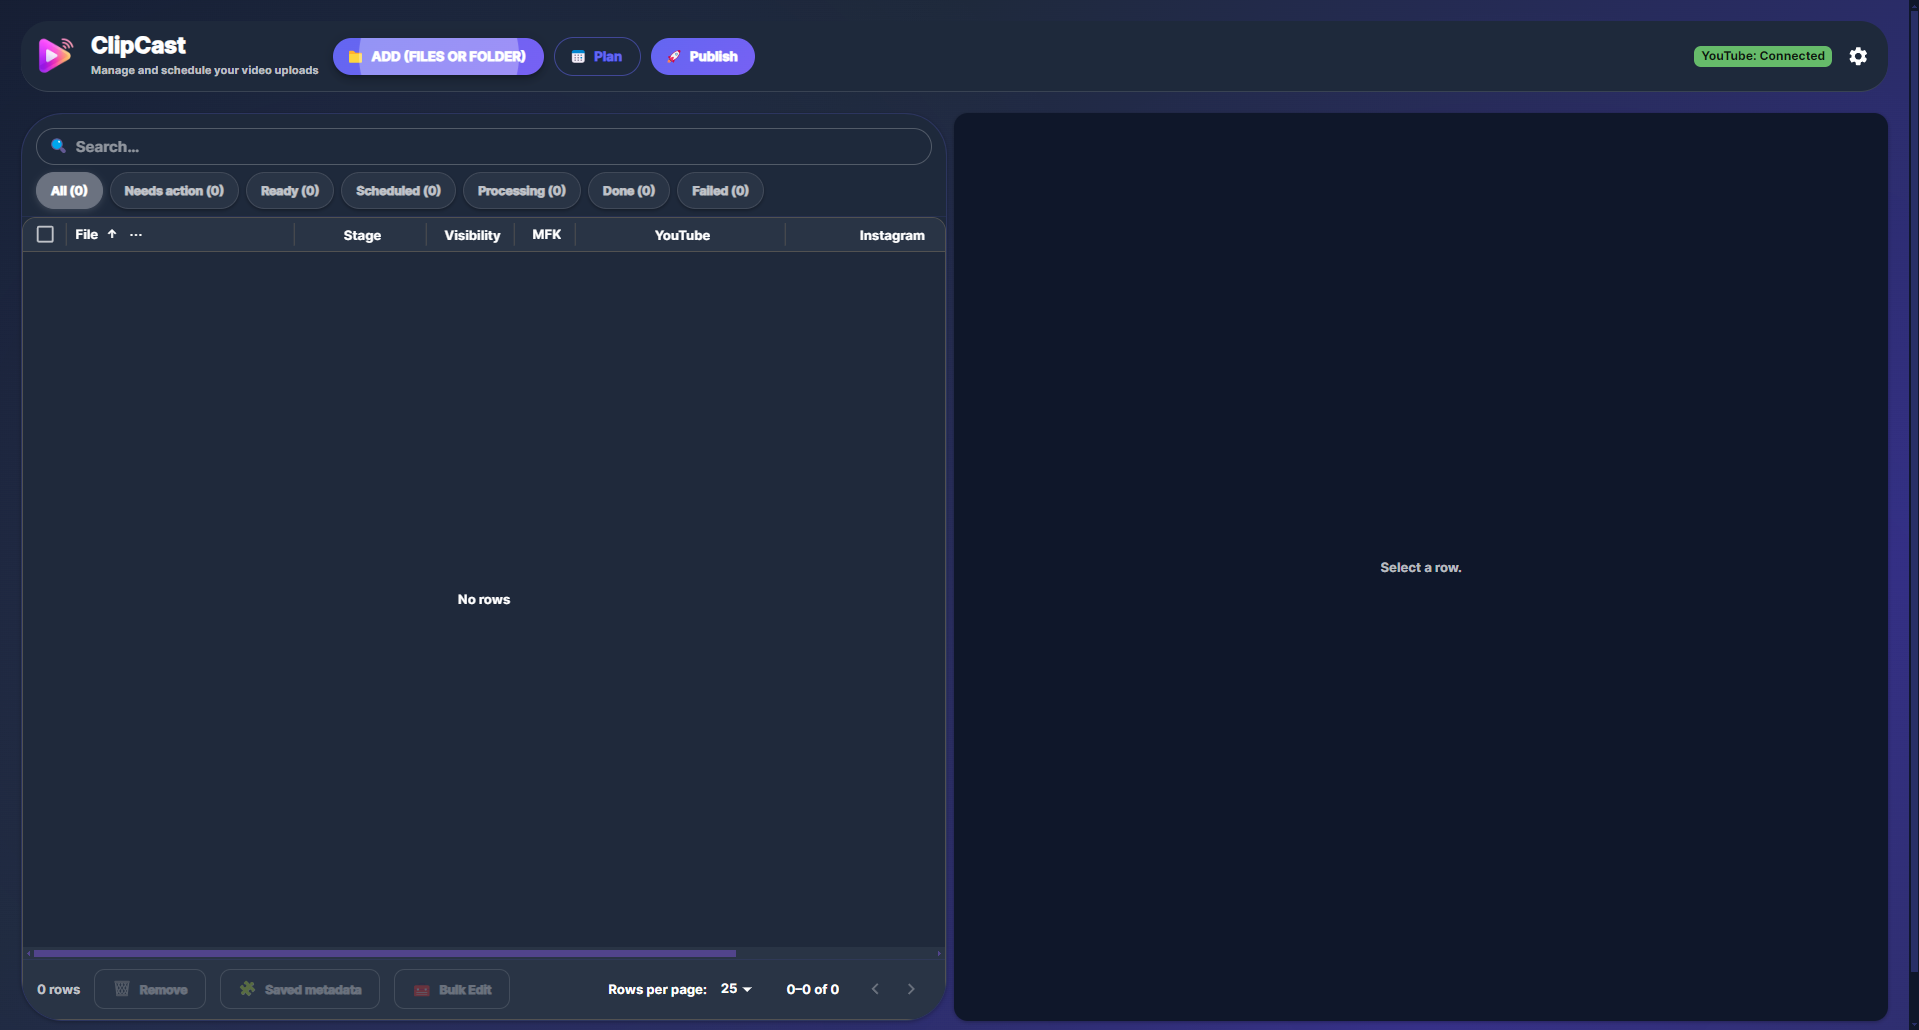
Screenshot 01 — Main layout: command bar, Jobs table, and Details panel
Step 2 — Command bar
The command bar shows the app logo and title, then the main actions: Add (opens a dialog to add Files or Folder), Plan (opens the Planner dialog), and Publish (opens the Publish dialog). On the right it shows a YouTube status chip (connected / not connected; click for Test connection or Reconnect), an optional Queue chip when jobs are processing, and a Settings (gear) icon. Clicking Settings opens a menu with: Interface, Account, Custom AI, Diagnostics, and Developer mode.

Screenshot 02 — Command bar: Add, Plan, Publish, YouTube status, Settings
Step 3 — Jobs table
Above the grid you have a search field and filter buttons: All, Needs action, Ready, Scheduled, Processing, Done. The Jobs table (DataGrid) lists one row per video: filename, stage, visibility, mfk (made for kids), schedule info. You can select one or multiple rows; the Details panel shows the selected row (or the first of the selection when multiple are selected).
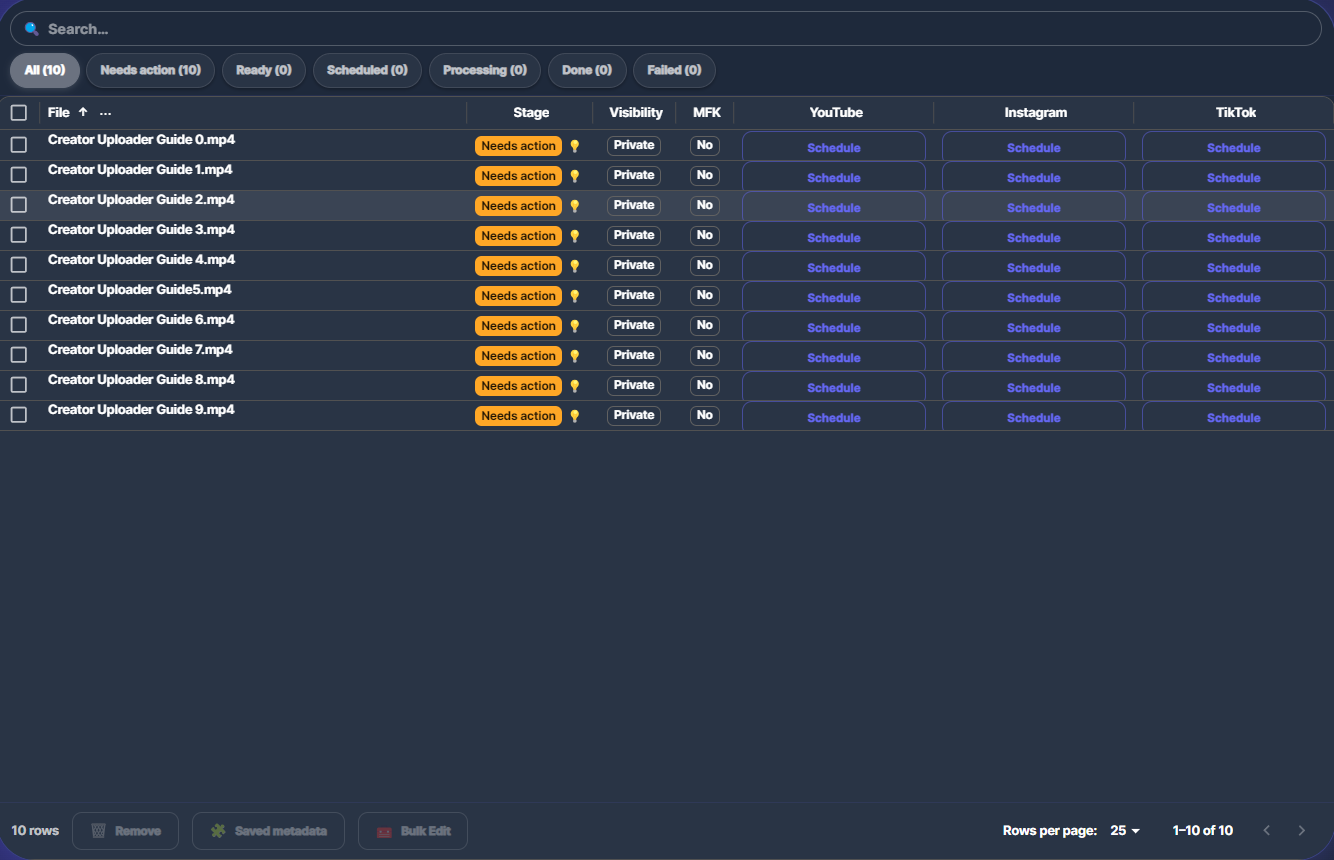
Screenshot 03 — Jobs table: search, filters, and video rows
Step 4 — Select a row and Details panel
Click a row to select it. The Details panel on the side updates: if no row is selected it shows a prompt to select a row; when a row is selected it shows that job’s status, Generate metadata (per platform or all), and per-platform blocks (YouTube, Instagram, TikTok) with title, description, and hashtags (editable), plus Copy actions, Assist now, Open upload page (Instagram/TikTok), Mark as posted, and plan actions (Edit plan, Remove plan, etc.).
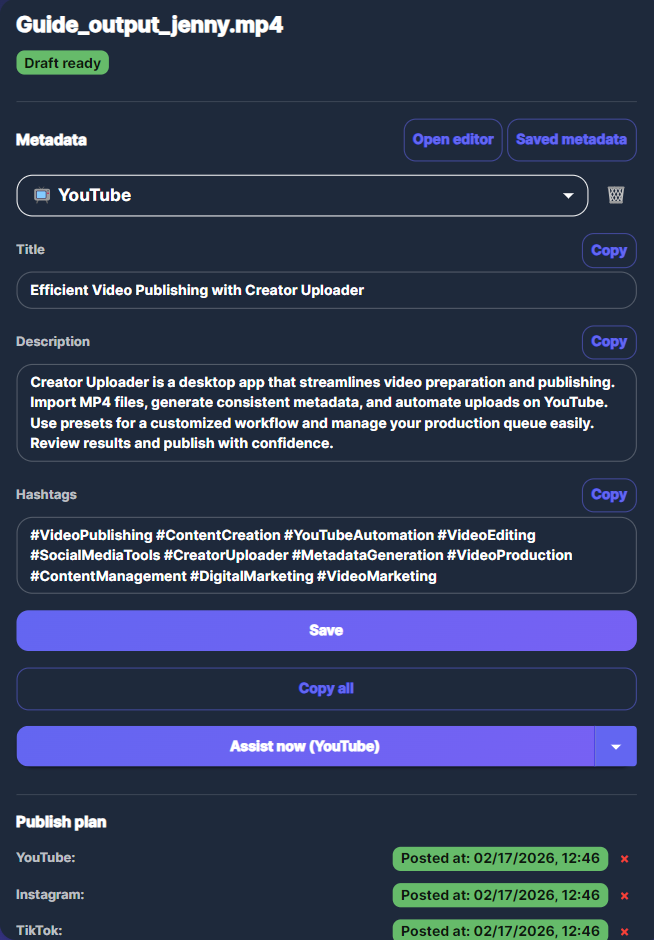
Screenshot 04 — Click a row; Details panel shows that row
Step 5 — Add, Plan, Publish
Add opens the Add Videos dialog where you choose Folder or Files to import videos. Plan opens the Planner dialog to set schedule slots, time zone, and apply a plan to selected rows. Publish opens the Publish dialog to upload to YouTube and/or prepare manual-assist for Instagram/TikTok. You can also generate metadata from the Details panel (when a row is selected) or via Publish → Metadata only → Generate.
Step 6 — Settings and Interface
Click the Settings (gear) icon to open the menu: Interface (opens the Interface dialog), Account, Custom AI, Diagnostics, Developer mode. The Interface dialog lets you set UI size (scale), Day/Night theme, Language, Command bar position (Top or Bottom), and Panels layout (Default or Swapped). Default layout is table on the left and details on the right; Swapped puts the details panel on the left and the table on the right.
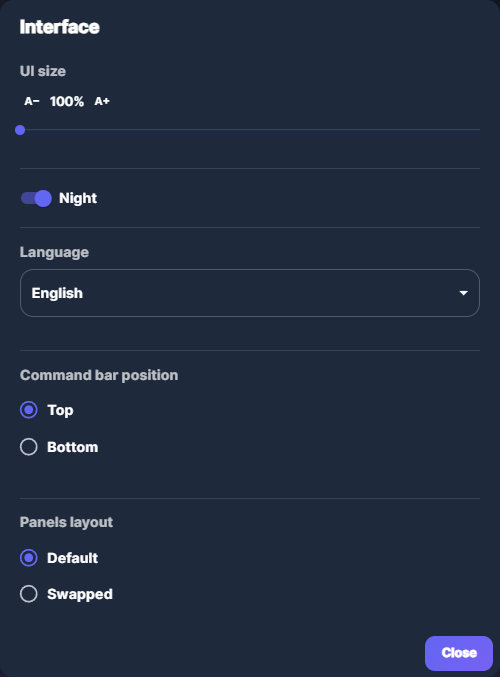
Screenshot 06 — Settings menu and Interface dialog
Summary
- Command bar: Add (Files/Folder), Plan, Publish; YouTube chip; Queue chip (when processing); Settings → Interface, Account, Custom AI, Diagnostics, Developer mode.
- Jobs table: Search, filters (All, Needs action, Ready, Scheduled, Processing, Done), grid of video rows; multi-select supported.
- Details panel: Shows selected row; Generate metadata; per-platform metadata (edit, copy); Assist, Open upload page, Mark as posted; plan actions.
Common issues
- Empty Jobs table — If the table stays empty after adding files, check that the folder path is correct and that the app has finished scanning; large folders can take a moment.
- Command bar position — If you prefer the bar at the top, open Settings → Interface and set Command bar position to Top.