Add Files & Jobs
Import video files or folders and add rows to the Jobs table.
You can add videos in two ways: via the Add Videos dialog (files or folder) or by drag-and-drop. Each added file becomes one row in the Jobs table. Duplicate paths (already in the table or in scheduled jobs) are skipped.
Step 1 — Open Add Videos
In the top toolbar, click Add (Files or Folder) to open the Add Videos dialog.

Screenshot 01 — Top toolbar: Add (Files or Folder) button
Step 2 — Choose files or a folder
In the Add Videos dialog you have two options (Windows cannot combine file and folder selection in one picker):
- Files — Opens the native file picker with multi-select. The picker is filtered to video types: MP4, MOV, MKV, WEBM. Select one or more files and confirm.
- Folder — Opens the folder picker. After you choose a folder, the app scans it for video files (MP4, MOV, MKV, WEBM, AVI) and adds them all.
The dialog closes after you confirm; new rows appear in the Jobs table.
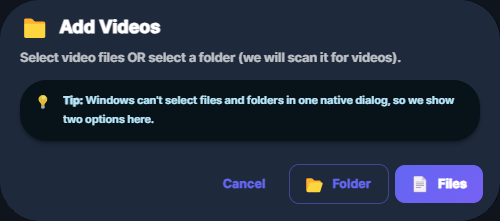
Screenshot 02 — Add Videos dialog: Files or Folder
Step 3 — Rows appear in the table
Each new file becomes one row in the Jobs table with default Title (filename), Status (e.g. Ready), and platform targets. If Auto plan is on, new rows get default targets and may get a Schedule (publish time) assigned automatically. If the app finds existing metadata for that file, the row status is updated to Done after a short check.
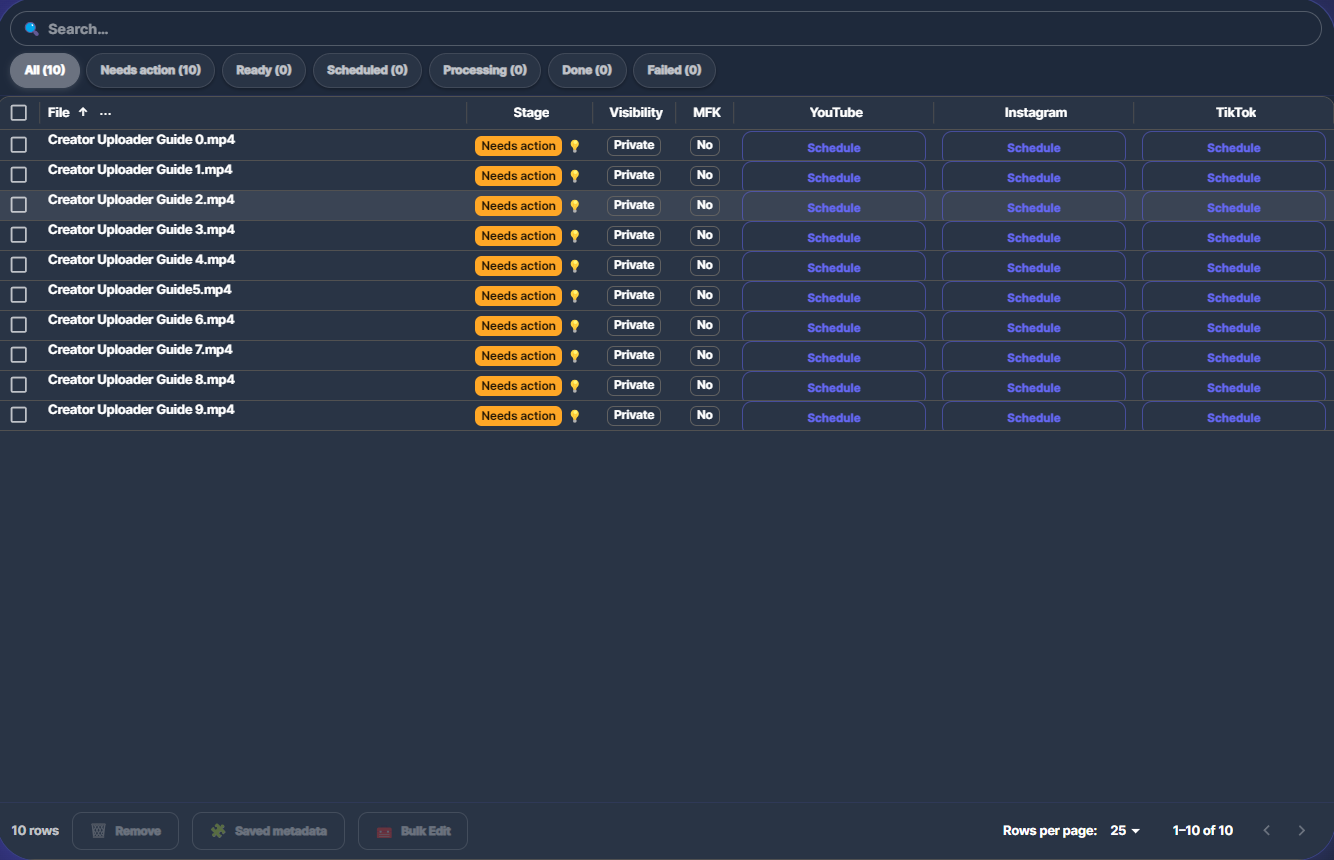
Screenshot 03 — Jobs table: each file appears as a row
Step 4 — Select a row for details
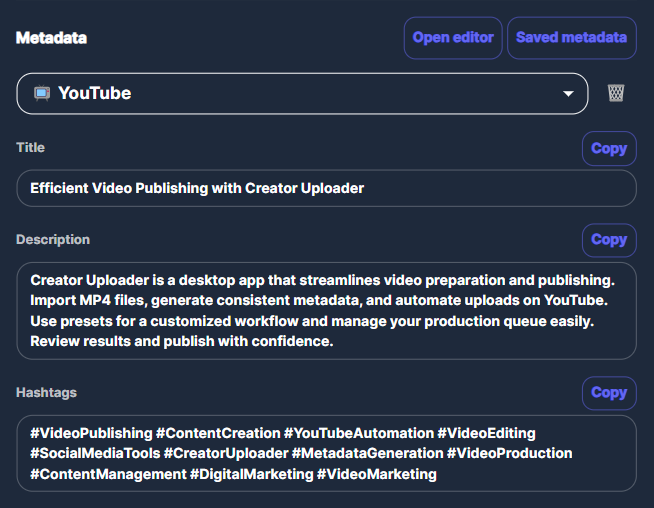
Click a row to select it. The Details panel on the right shows that row’s file path, metadata, schedule, and targets.
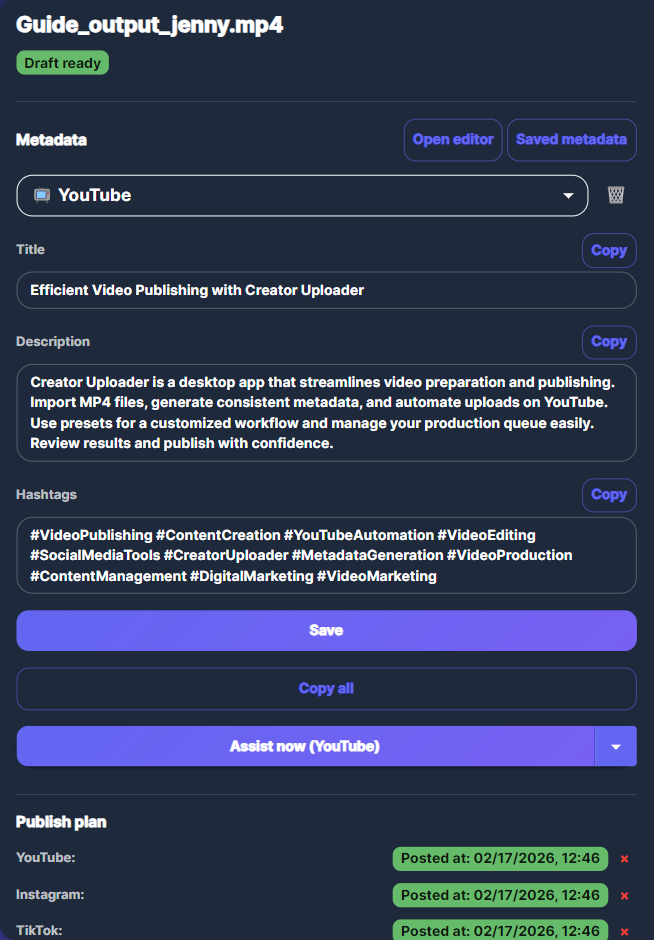
Screenshot 04 — Details panel shows selected row
Step 5 — Edit title and description
In the Details panel, edit Title and Description as needed. After running the pipeline, you can refine the AI-generated metadata here.
Screenshot 05 — Details panel: title and description
Step 6 — Run the pipeline
Click Generate in the Details panel (Metadata section) for the selected row, or select multiple rows, click Publish, choose Metadata only, then Generate. Outputs are saved to your Outputs folder and the row status updates.
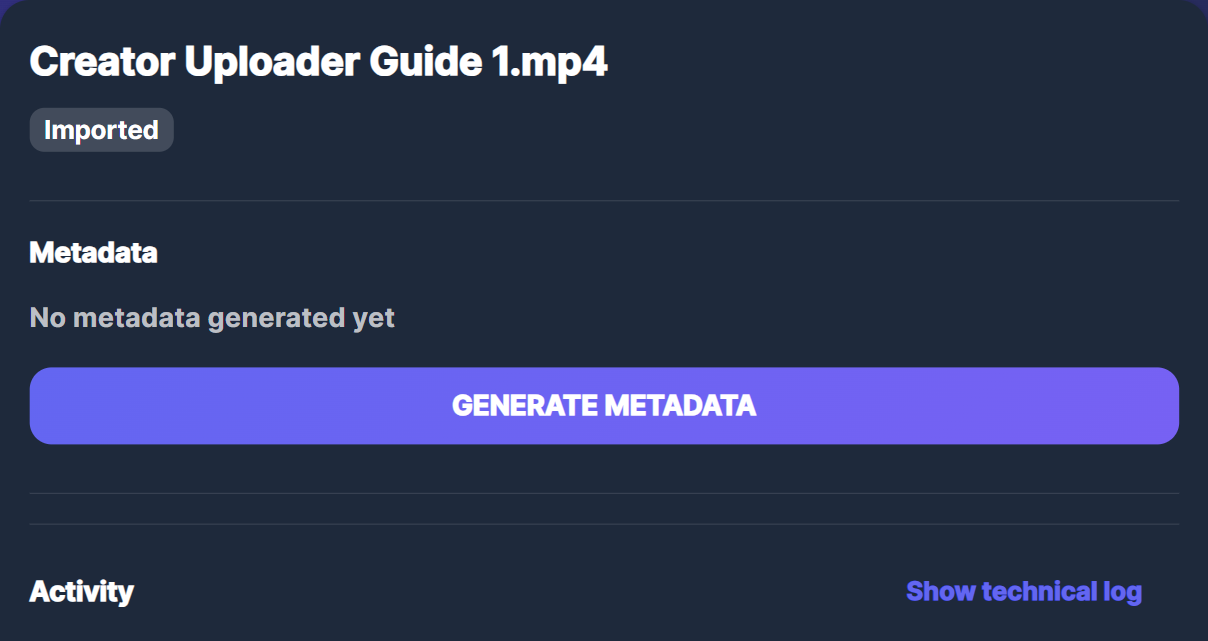
Screenshot 06 — Details panel: Generate
Drag-and-drop — You can also drop video files onto the main app area. Supported extensions for drop: MP4, MOV, AVI, MKV, WEBM, FLV, WMV, M4V. The same logic applies: one row per file, duplicates skipped.
Sort order — When you add multiple files at once, they are ordered according to the current Sort by setting (File column menu): Added order, Name (A–Z), or Creation date. After adding, the table filter is set to All so new rows are visible.
Common issues
- Unsupported formats — The file picker only lists MP4, MOV, MKV, WEBM. Folder scan also includes AVI. Other formats are not added via the dialog; drag-and-drop accepts more (e.g. AVI, FLV, WMV, M4V).
- Duplicate file — If a file path is already in the table or in scheduled jobs, it is skipped (no second row).
- Missing file — If a file was moved or deleted, remove the row or re-add the file from its new location.
- Many files — You can add many at once; run the pipeline per row or in batch. See Pipeline for logs and where outputs are stored.