Scheduler
Schedule publishing per platform and in bulk with Plan.
You can schedule videos in two ways: per row, per platform (schedule dialog) or in bulk (Plan dialog). Setting a date and time for a platform creates a scheduled job for that platform; it enters the queue and runs at the scheduled time. Schedules use the time zone you choose (default is local / system time).
1. Per-row, per-platform (schedule dialog)
In the Jobs table, each row has a column for YouTube, Instagram, and TikTok. Click the cell for the platform you want to schedule. The Schedule for [platform] dialog opens.
- YouTube: Choose Upload now (upload immediately), Assist to YouTube now (manual), or Schedule for later and set Date & time. The main button becomes Upload now, Assist now, or Schedule.
- Instagram / TikTok: Choose Open [platform] now (manual) or Schedule for later and set Date & time. The main button becomes Open now or Schedule.
Confirming Schedule for later creates a scheduled job for that platform and stores the time in that cell. The platform is then the target for that row (for Manual Assist or Auto Upload).
2. Bulk scheduling (Plan dialog)
Click Plan in the top toolbar to open the Plan dialog. It applies only to selected rows and only to unscheduled slots (per platform). You must select at least one row for the apply button to be enabled.
At the top
- Auto plan on import (⏰) — When ON, newly added rows get publish times assigned automatically from the current plan defaults (start date, time slots, time zone, Targets). When OFF, new rows are not auto-scheduled.
Targets (Apply to which platforms)
Toggle: All, YouTube, Instagram, TikTok. This sets which platforms receive the scheduled times when you apply.
Plan summary
When you have times and start date set, a short summary appears (e.g. slots per day, times, time zone, start date).
Mode: Simple | Custom
- Simple — Presets: 3/day, 4/day, Hourly (click a chip to fill times). Start date (with calendar). Time zone (dropdown). Slots per day (read-only, follows the number of times). Times — list of HH:mm chips; use Add time to add a slot, or remove a chip to drop that time.
- Custom — Start date, Time zone, then Times (manual input or Generate times tool: start/end, step or spread evenly). Options: Multiple jobs per video, Conflict detection.
Apply
- If you have rows selected: the button shows Apply to N items. Click it to apply the plan to the selected rows; only unscheduled platform slots get a time.
- If no rows are selected: the button shows Apply plan to unscheduled items and is disabled; the hint says to select at least one row.
The footer explains: plan applies only to items without manually set times (unscheduled slots).
Step 1 — Open schedule dialog (per platform)
Select a row. In the Jobs table, click the YouTube, Instagram, or TikTok cell for that row. The Schedule for [platform] dialog opens. Choose Upload now / Open now, Assist now (YouTube), or Schedule for later and, if later, set Date & time, then click Schedule (or Upload now / Open now / Assist now).
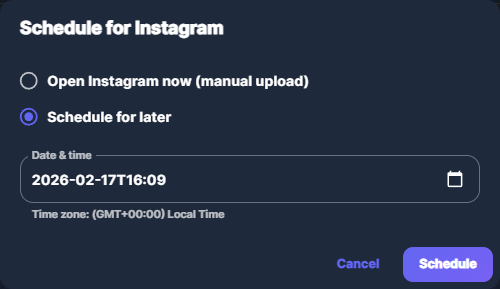
Screenshot 01 — Schedule dialog: Upload now / Schedule for later, date & time
Step 2 — Set date and time
When you choose Schedule for later, use the Date & time field. The helper text shows the time zone (e.g. local time). Times are stored and used in the selected time zone.
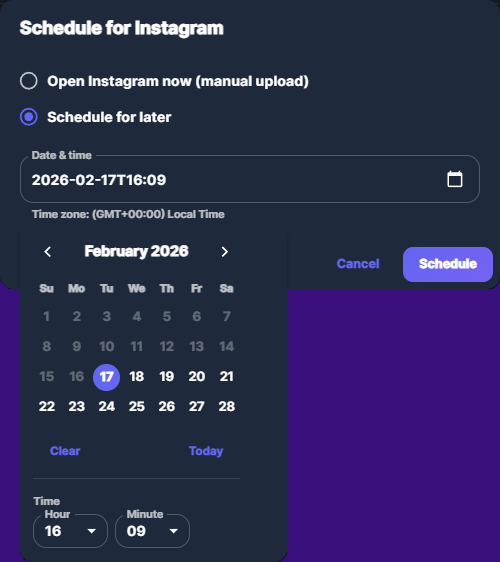
Screenshot 02 — Date & time for publication
Step 3 — Open Plan dialog
Click Plan in the top toolbar. Select one or more rows first so the apply button is enabled. In the Plan dialog you can turn Auto plan on import ON or OFF, set Targets (All / YouTube / Instagram / TikTok), choose Simple or Custom mode, and set start date, time zone, and times (presets or manual).
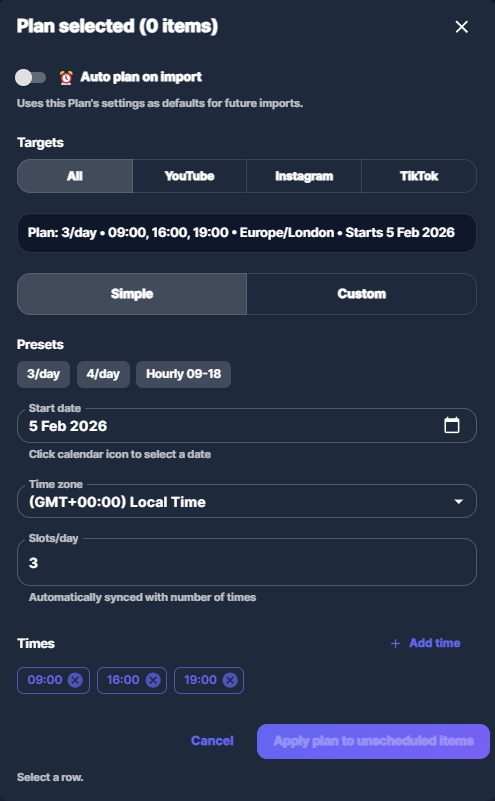
Screenshot 03 — Plan: Auto plan on import, Targets, Simple/Custom, presets
Step 4 — Set times and Apply to N items
In Simple mode, pick a preset (3/day, 4/day, Hourly) or add/remove times, set Start date and Time zone. Click Apply to N items (N = number of selected rows) to assign publish times to the selected rows for the chosen Targets; only unscheduled slots are filled.
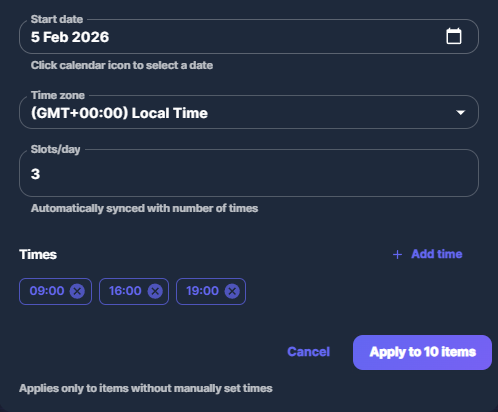
Screenshot 04 — Set times and start date, then Apply to N items
Common issues
- Local time / time zone — Schedules use the time zone set in the schedule dialog or in the Plan dialog (default can be system/local). DST is handled by the app.
- Plan applies only to unscheduled — If a row already has a time set for a platform, that slot is not overwritten by Plan. Use the per-platform schedule dialog to change it.
- Select rows before Apply — The Plan dialog applies only to selected rows. Select rows with the checkboxes in the Jobs table, then open Plan and click Apply to N items.