Getting Started
Install the app and publish your first batch.
This guide follows the real app workflow: add videos → generate metadata → plan (set targets and schedule) → publish (YouTube automatically, or Manual Assist for Instagram/TikTok).
Step 1 — Download the app
Go to the Download page and get the installer for Windows or macOS.
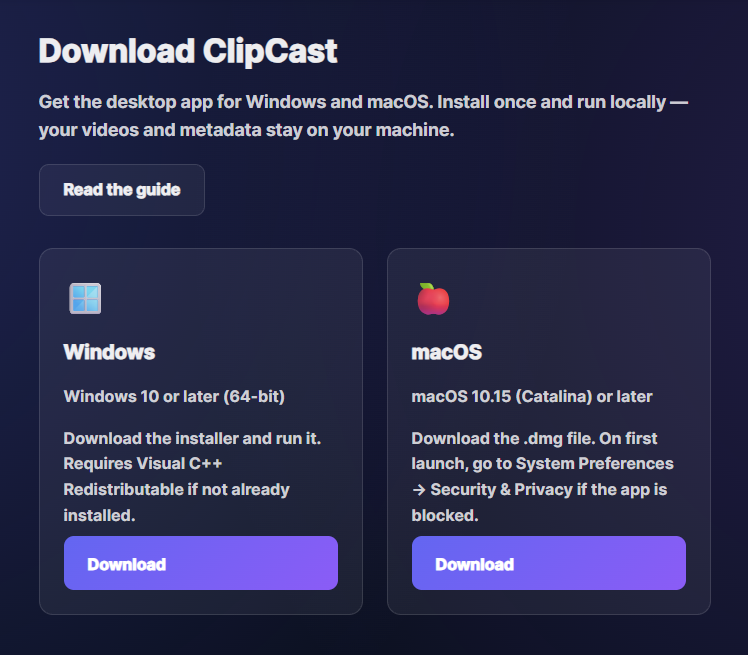
Screenshot 01 — Download the installer for your OS
Step 2 — Install
Run the installer and follow the prompts. Accept defaults or choose an install location.
Step 3 — Launch the app
Launch ClipCast from the Start Menu (Windows) or Applications (macOS).
Step 4 — Main window layout
You work from the main window: the top command bar (Add, Plan, Publish, YouTube status, Settings), the Jobs table, and the Details panel on the right. Use checkboxes in the table to select one or more rows for bulk actions; click a row to open the Details panel for that video.
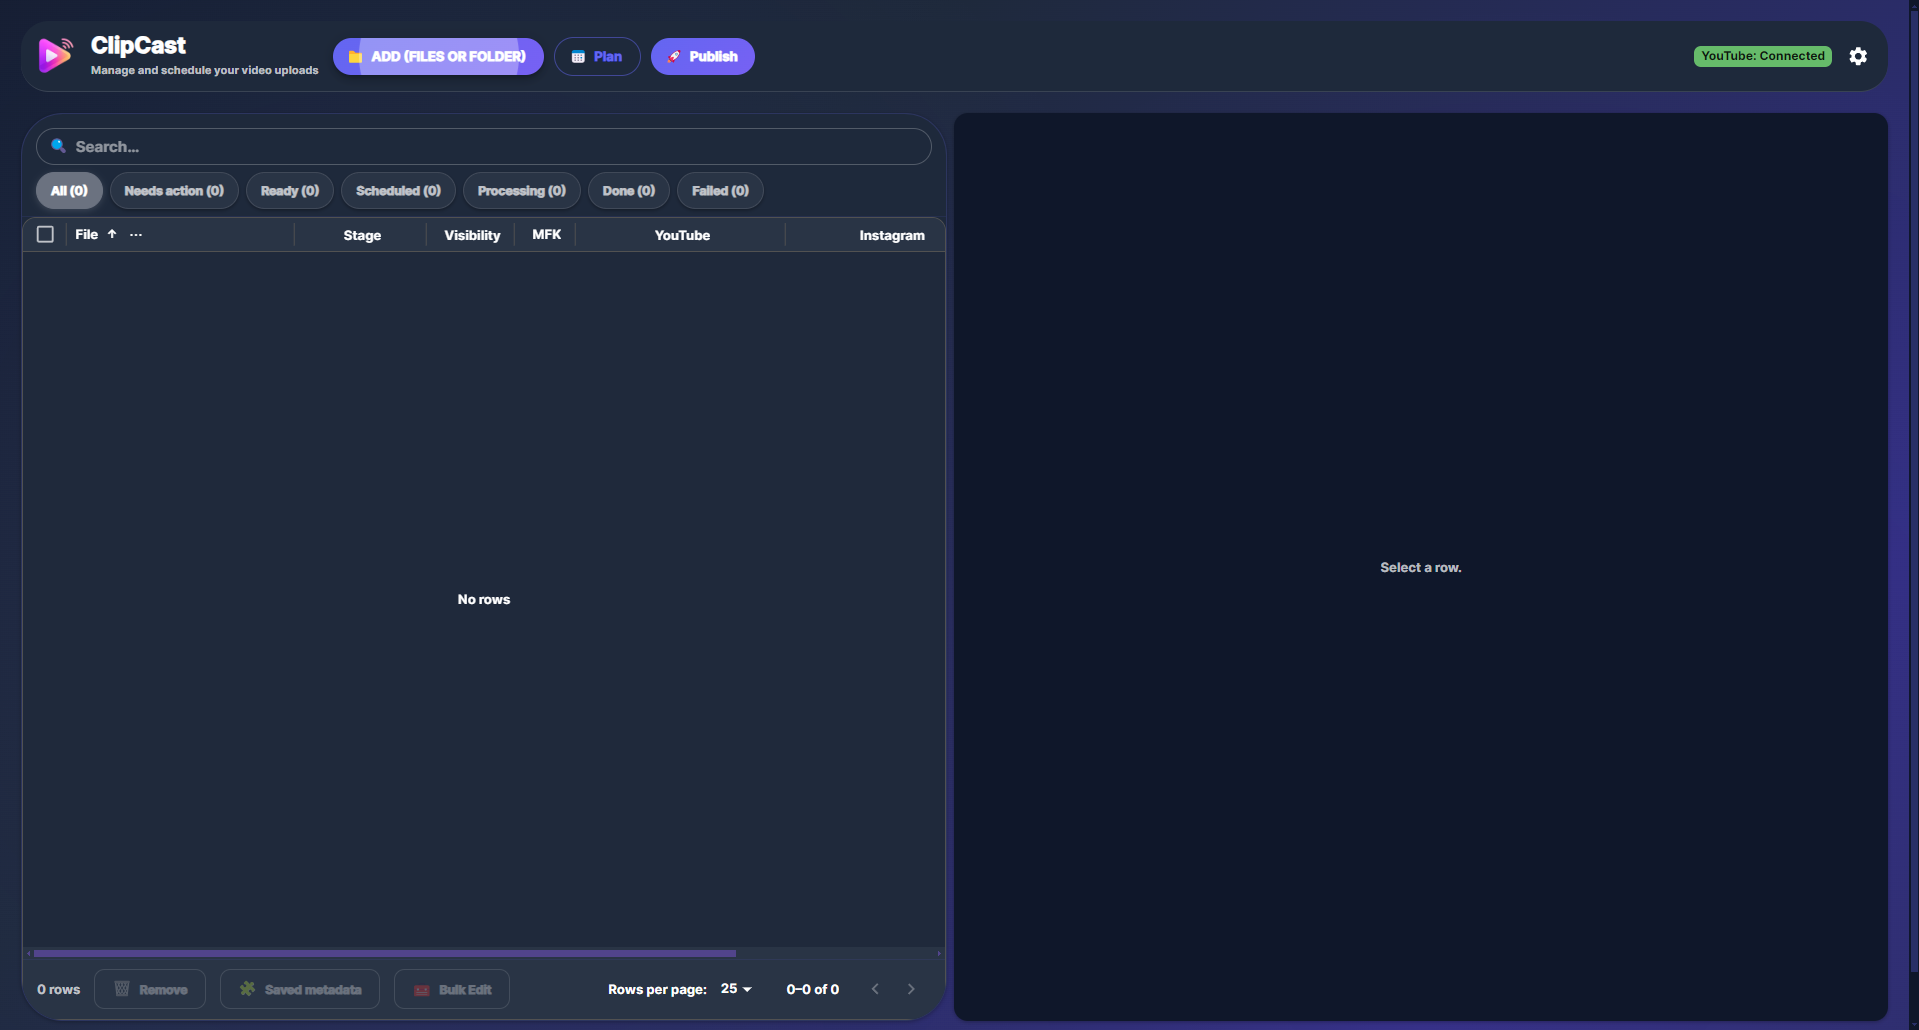
Screenshot 04 — Main window: command bar, Jobs table, Details panel
Step 5 — Add videos (files or folder)
Click Add in the command bar to open the Add Videos dialog. Choose Files (native file picker; multi-select MP4, MOV, MKV, WEBM) or Folder (folder picker; the app scans for videos and adds them). Each video becomes one row in the Jobs table. You can also drag-and-drop video files onto the app. Duplicates (path already in the table or in scheduled jobs) are skipped.

Screenshot 05 — Add Videos dialog: Files or Folder
Step 6 — Generate metadata (bulk)
Select one or more rows, click Publish, choose Metadata only, then click Generate. The app runs the pipeline (transcript + AI metadata) only for rows that do not yet have metadata for the requested platforms; outputs are written to your Outputs folder. Row status updates to Processing then Done (or Error). If all selected rows already have metadata, you see a message and no pipeline runs.
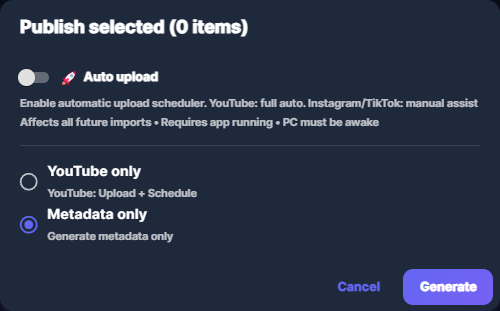
Screenshot 06 — Publish → Metadata only → Generate
Step 7 — Generate metadata (single row)
For a single video: click a row to open Details, then in the Metadata section click Generate. You can generate for all platforms or only for missing ones. Pipeline behavior is the same as bulk (outputs in your Outputs folder).
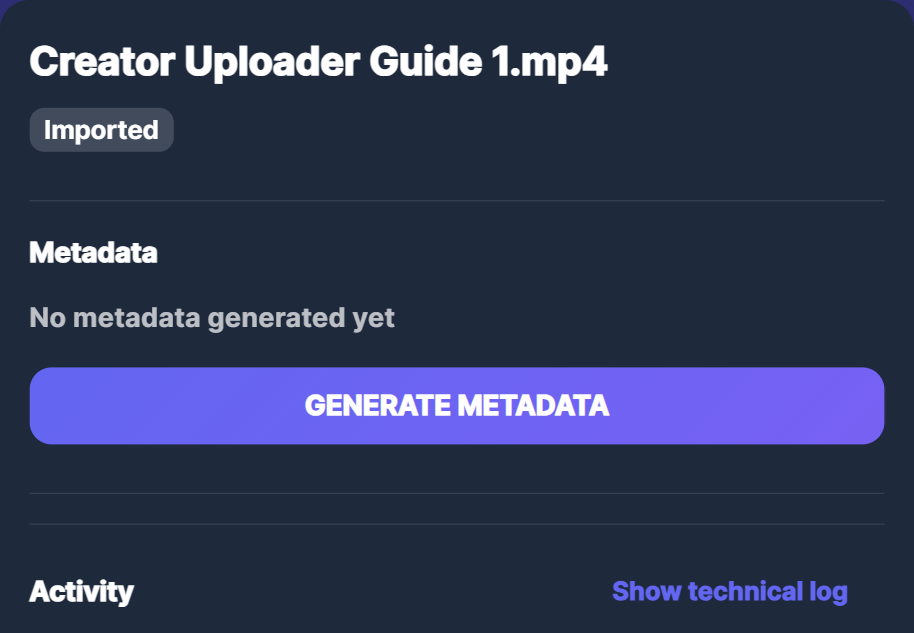
Screenshot 07 — Details → Metadata → Generate
Step 8 — Plan: set targets and schedule
Select the rows you want to schedule. Click Plan. In the Plan dialog: (1) Targets — choose All, YouTube, Instagram, or TikTok (this sets which platforms get the schedule and enables those targets on the selected rows). (2) Set times (e.g. presets 3/day, 4/day, or add custom times), start date, and time zone. (3) Click Apply to N items (the button shows the number of selected rows). The plan is applied only to the selected rows; each gets the chosen targets and the next available slot from the start date. If Auto plan on import is on, new videos you add later get default targets and may be auto-scheduled using the same plan settings.
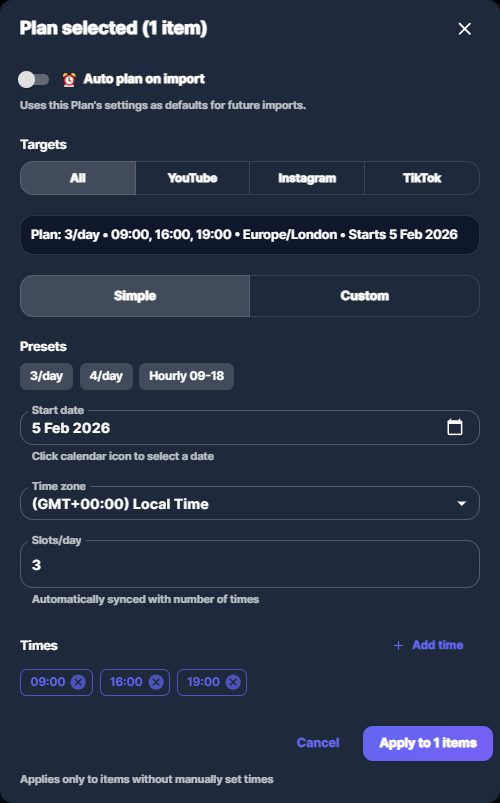
Screenshot 08 — Plan: set targets, times, start date, then Apply to N items
Step 9 — Publish to YouTube
Select one or more rows, click Publish, choose YouTube only, then Publish to YouTube. Rows with a future publish time are scheduled on YouTube; rows without a future time are uploaded now. You must be signed in to YouTube (the command bar shows YouTube connected when ready).
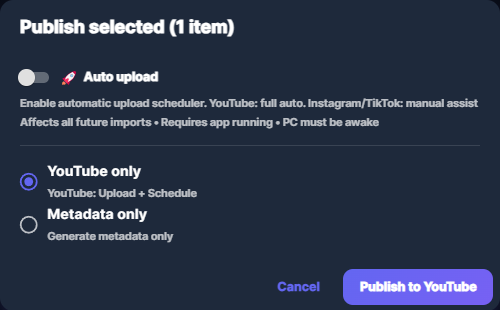
Screenshot 09 — Publish → YouTube only → Publish to YouTube
Step 10 — Auto upload and Manual Assist
In the Publish dialog you can enable Auto upload: scheduled items run automatically. YouTube uploads and schedules fully in the app. For Instagram and TikTok, the app cannot upload directly; use Manual Assist: open the Manual Assist view in the app. There you see the queue of due jobs, use Assist Next to open the platform upload page and copy caption/hashtags to clipboard, then Mark as posted when done.
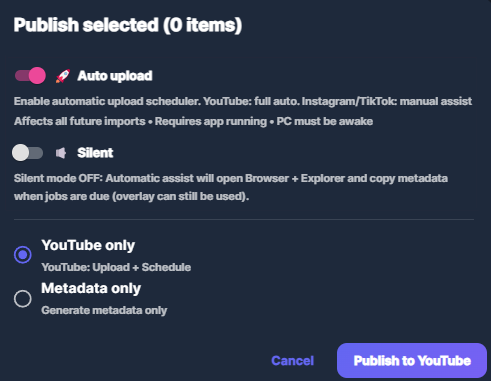
Screenshot 10 — Auto upload and Manual Assist
Common issues
- App won't start — On Windows, install the latest Visual C++ redistributable. On macOS, if the app is blocked, go to System Preferences → Security & Privacy and allow ClipCast.
- Where files are stored — Row data and pipeline outputs use folders on your machine. The Outputs folder is configurable in Settings.
- No metadata generated — Ensure rows are selected before Publish → Metadata only → Generate. Only rows that lack metadata for the requested platforms are sent to the pipeline; if all selected already have metadata, you get a message.
- Plan does nothing — You must select at least one row before opening Plan. The Apply to N items button applies the plan only to the selected rows.